
Nuvi now has a registered bot identity. Next: make it actually respond. With your project folder, virtual environment, and starter file ready, you’ll build a minimal bot foundation. This first version just proves the connection works. We also turn on one permission (message_content) now so later pages can add auto‑translation without revisiting setup.
In this part, you will:
- Add
discord.pytorequirements.txtand install it (VS Code UI — no terminal typing required) - Write a basic bot that responds to a slash command
/hello - Enable the message content intent (needed later for auto‑translation)
- Run and test the bot
 Nuvi says: Your first goal is just to see the bot come online—translation comes later. Small wins keep momentum!
1. Add and Install the discord.py Library (Using requirements.txt + VS Code UI)
We’ll declare the dependency first, then let VS Code install it into your virtual environment.
1.a Add it to requirements.txt
- Open
requirements.txtin your project. - Add this line (the file can just contain this for now):
discord.py
- Save the file
1.b Install via the Environment Manager UI
- Open the Python extension view (Python icon in the Activity Bar) and confirm the correct environment (e.g.
.venv) is selected. - Select the “Packages” icon (it looks like a box) which will show a dropdown. Now select “Install project dependencies”

- Click the checkbox for “requirements.txt” and click “Ok”

- Wait until
discord.pyappears in the installed packages list.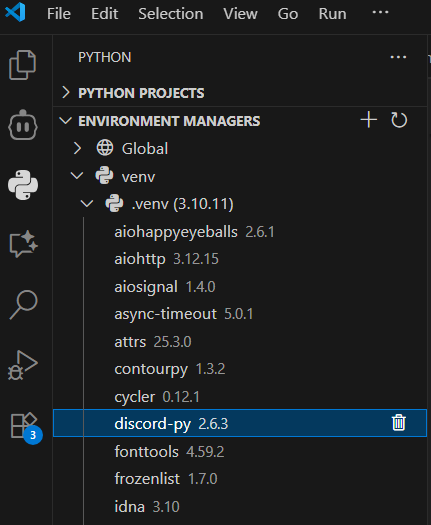
2. Write the Bot Code
Open bot.py and replace any placeholder code with the following. (You’ll notice a user_languages dictionary already—this is a “placeholder notebook” we’ll actually start using when we add registration and auto‑translation soon.)
import discord
from discord.ext import commands

TOKEN = "<your token here>"

# This is where we remember which language each user wants
# It's like a notebook: user_languages[user_id] = "en" or "es"
user_languages = {}

# Tell Discord our bot needs to read messages (not just commands)
intents = discord.Intents.default()
intents.message_content = True
bot = commands.Bot(command_prefix="!", intents=intents)

@bot.event
async def on_ready():
    print(f"Bot is online as {bot.user}!")
    try:
        synced = await bot.tree.sync()
        print(f"Synced {len(synced)} commands.")
    except Exception as e:
        print(f"Error: {e}")

@bot.tree.command(name="hello", description="Says hello!")
async def hello_command(interaction: discord.Interaction):
    await interaction.response.send_message(f"Hello {interaction.user.display_name}! Have a great day coding!")

if not TOKEN:
    raise RuntimeError("Bot token missing. Add it to the TOKEN variable near the top of the file.")

bot.run(TOKEN)
What this does:
- Imports the Discord library so you don’t reinvent networking.
- Sets up “intents” and enables
message_contentearly (future auto‑translation needs to read messages). - Creates and starts a bot connection.
- Registers a slash command
/helloto prove command syncing works. - Uses
user_languages = {}as a simple in‑memory place we’ll fill later. - Replies with a personal greeting when
/helloruns. - Safety check: stops if the token is missing.
-> Advanced details (click to expand if you'd like to learn about more of the advanced concepts used here. Totally optional!)
async / await: These keywords let Python run other tasks while waiting (for example, for Discord to reply) so your bot doesn’t freeze.
Event (@bot.event): Decorators like @bot.event tell the library “run this function when a specific event happens” (here: when the bot is ready).
Slash commands (@bot.tree.command): These create modern commands that appear when users type / in Discord. They’re registered with Discord’s servers and may take a short time to sync.
Interaction: Represents a user using a slash command. interaction.user gives you the person, and interaction.response.send_message(...) sends a reply.
Bot vs Client: commands.Bot adds helpful command features (like command trees) on top of the lower-level Discord client.
Intents: Permissions telling Discord what data you want (messages, members, etc.). Using fewer keeps your bot simpler and safer.
Exceptions (try / except): The try: block runs code that might fail; except Exception as e: catches errors so your bot can log them instead of crashing.
Warning: For simplicity we show the token inline. In real projects store secrets in environment variables or a secure vault.3. Run the Bot
- Open
bot.pyin the editor. - Open the Run & Debug view (play icon with a bug).
- If asked to select a configuration, choose
Python File. - Click the green Run/Debug button.
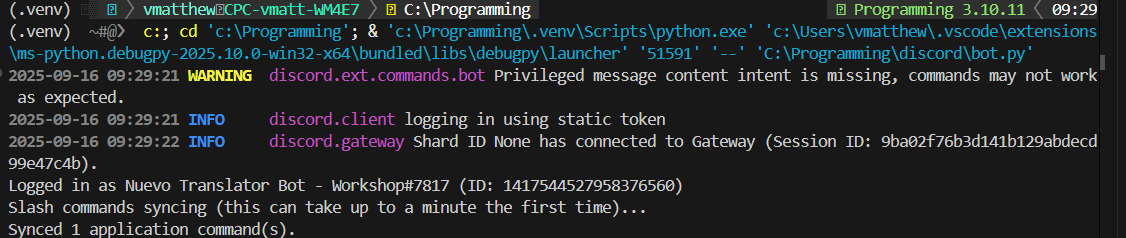
- Watch the Debug Console / Terminal for:
Logged in as <your bot name>
Synced X application command(s).
4. Test the /hello Command in Discord
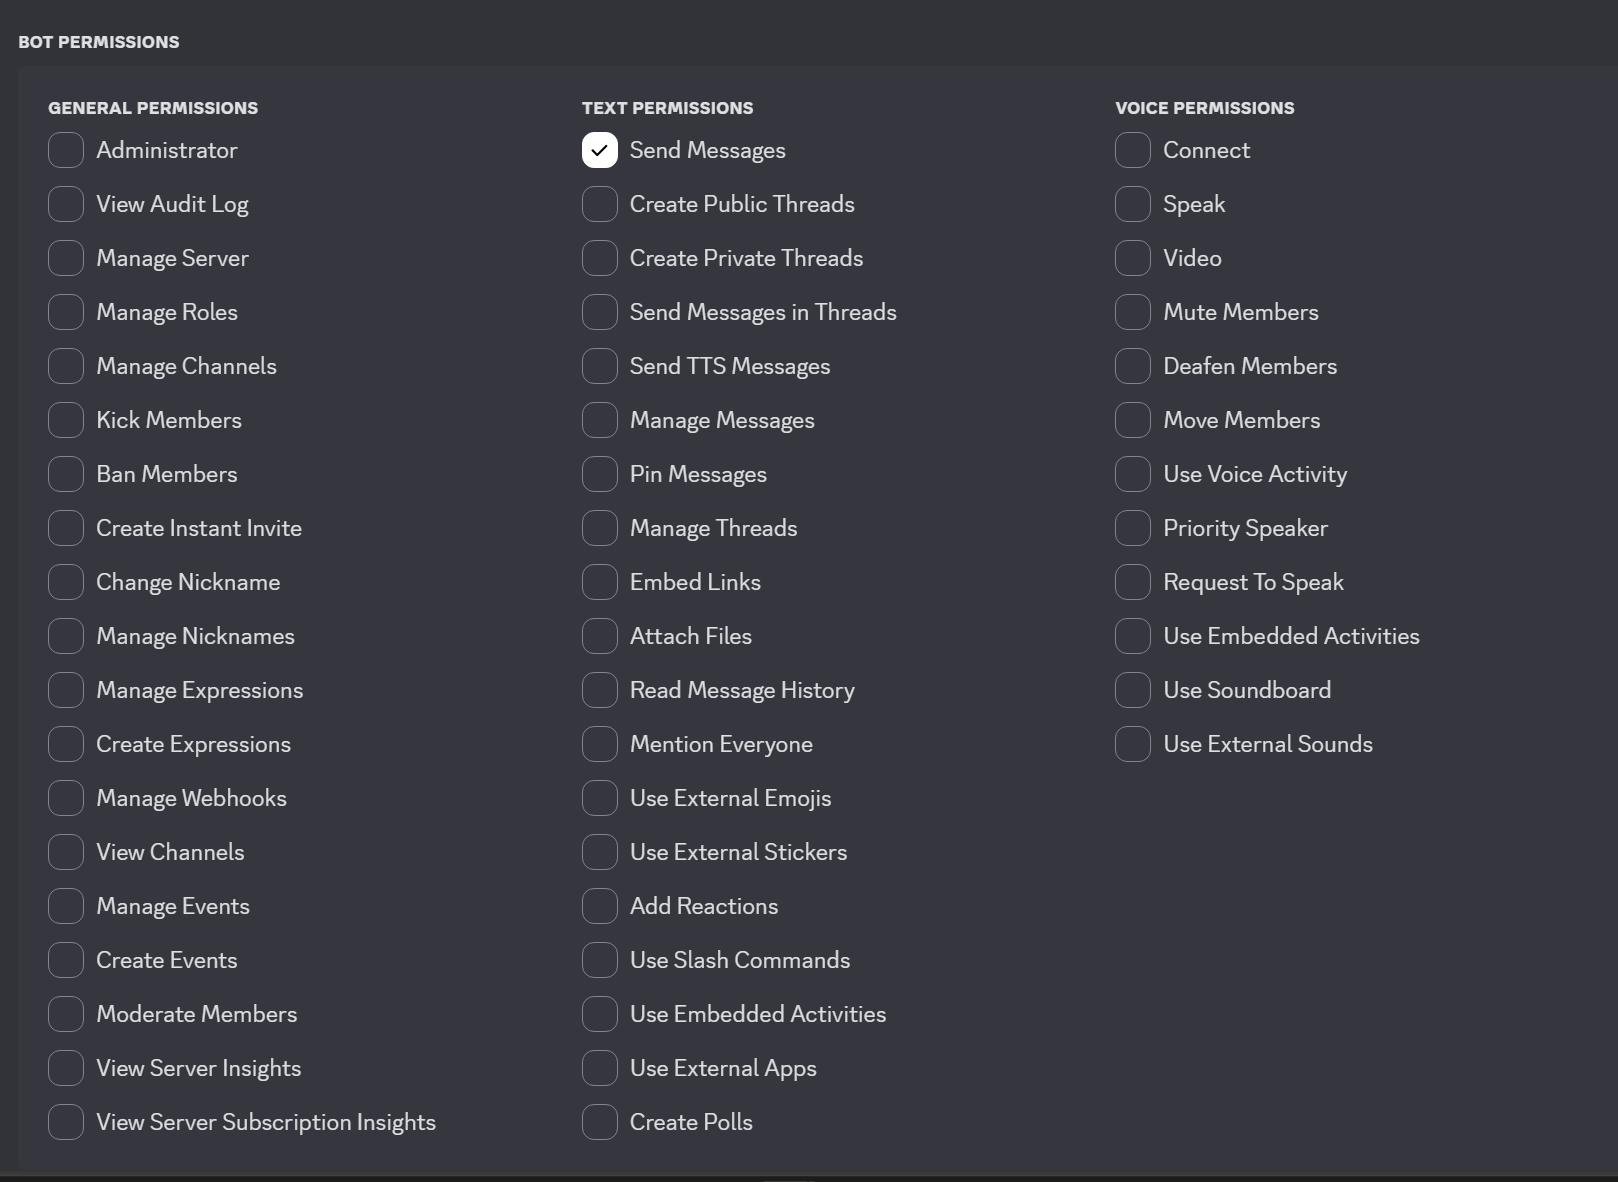
- Invite your bot to a server where you have permissions (you can generate an invite link from the Developer Portal under “OAuth2 → URL Generator” with the
botandapplications.commandsscopes, as well as theSend Messagestext permission).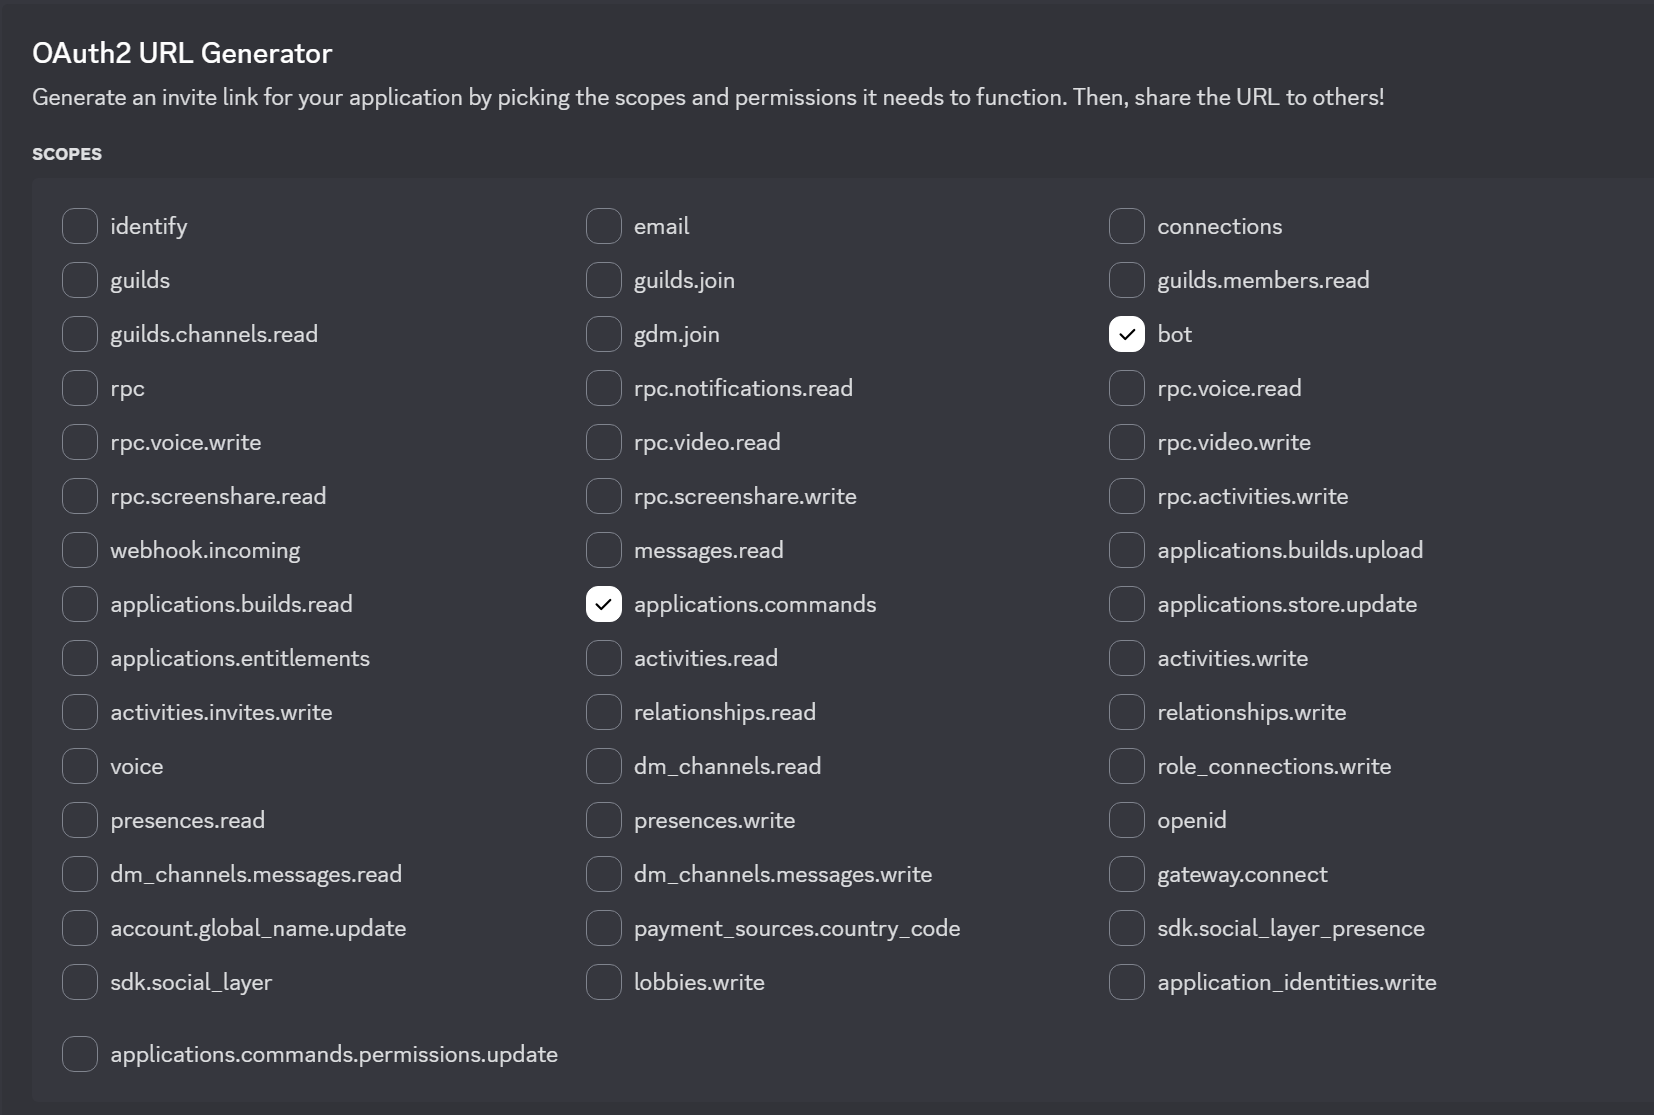

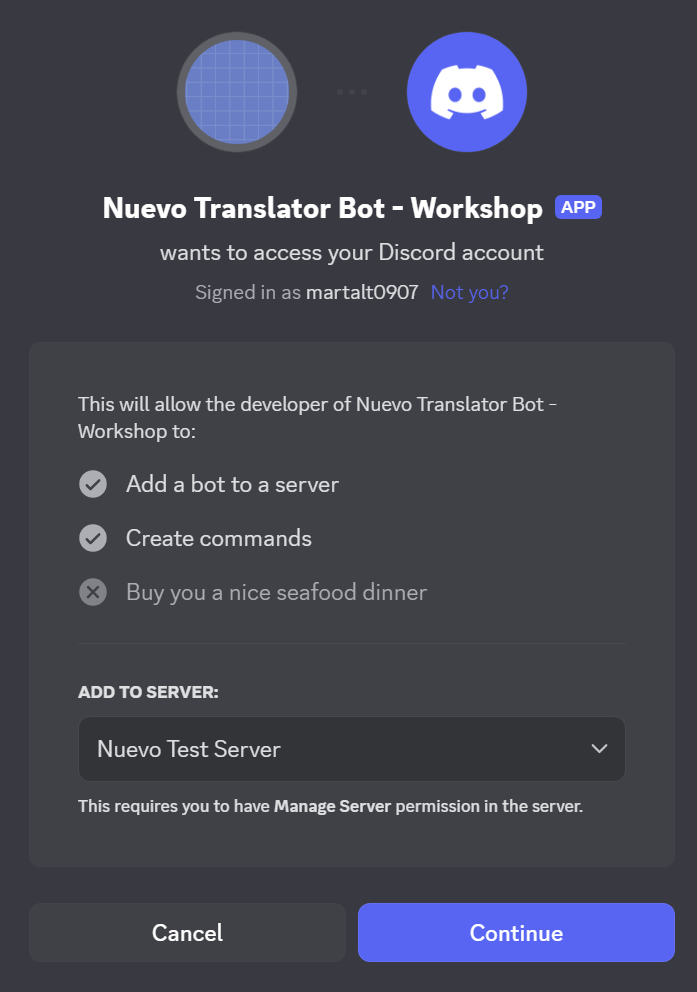
- Copy the url and paste it into your browser. That should open a Discord page asking you to select a server to invite the bot to. Select your test server.
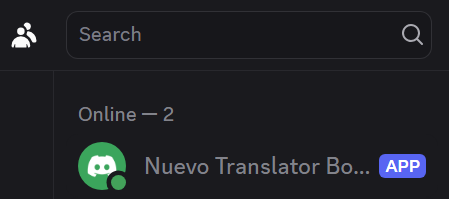
- Make sure the bot is running, you should see it online in the member list.
- In any text channel where the bot is present, type
/hello. - You should see:
Hello <your Discord username here>!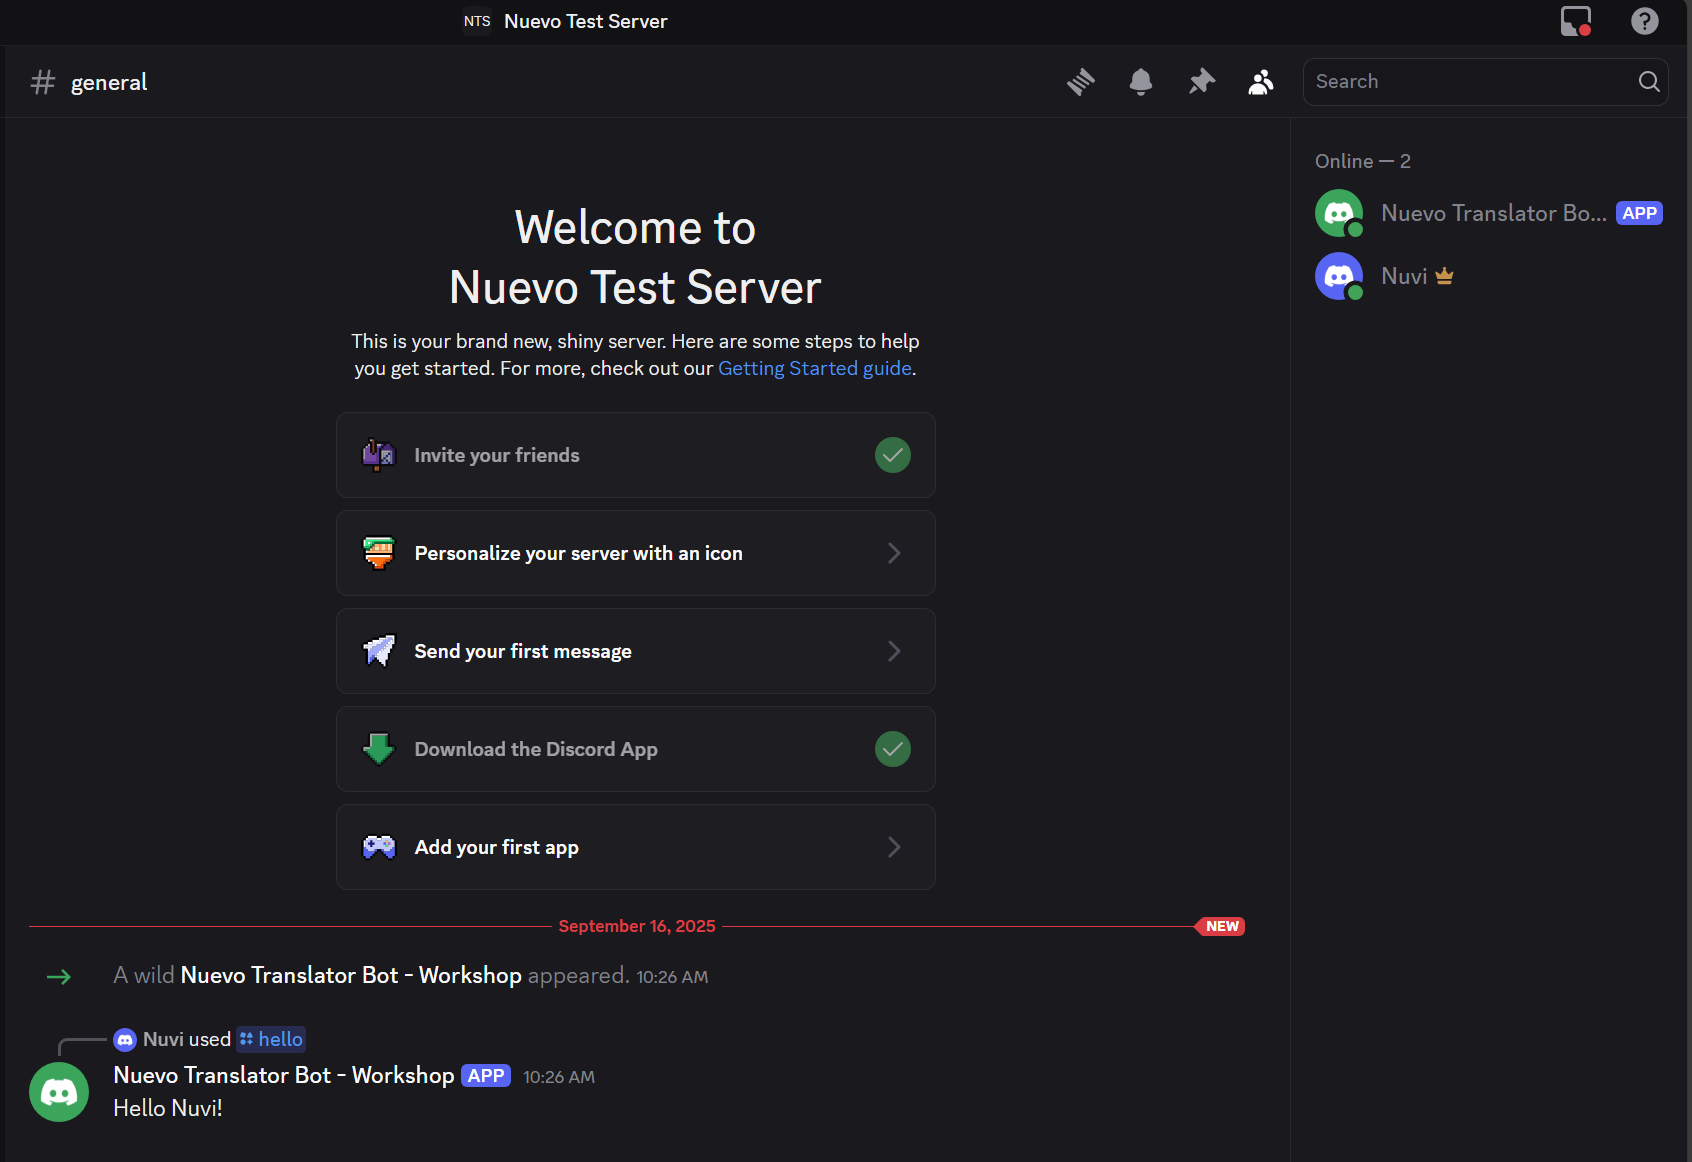
Nuvi tip: If `/hello` doesn’t autocomplete right away, wait up to 60 seconds or restart the bot—Discord is syncing commands.Level Up Challenges
- Create a
/smilecommand that replies with 🙂 - Add a
/pingcommand that replies withPong! <ms> ms. - Add an
/aboutcommand describing what the bot will eventually do
5. Troubleshooting
| Problem | Possible Fix |
|---|---|
DISCORD_BOT_TOKEN is missing error | Ensure the TOKEN=... line is present |
| Slash command not showing | Wait 1–2 minutes, ensure the bot is in the server, and that applications.commands scope was included in the invite. |
403 or permissions error | Recreate invite URL with needed scopes. |
| Wrong Python environment / import errors | Verify the .venv is selected in the Python extension view; reinstall discord.py there. |
ModuleNotFoundError: discord | The package isn’t installed in the selected environment—reinstall via the Packages UI. |
| Bot shows online but no response | Confirm you used /hello (slash command), not !hello. |